Introduction
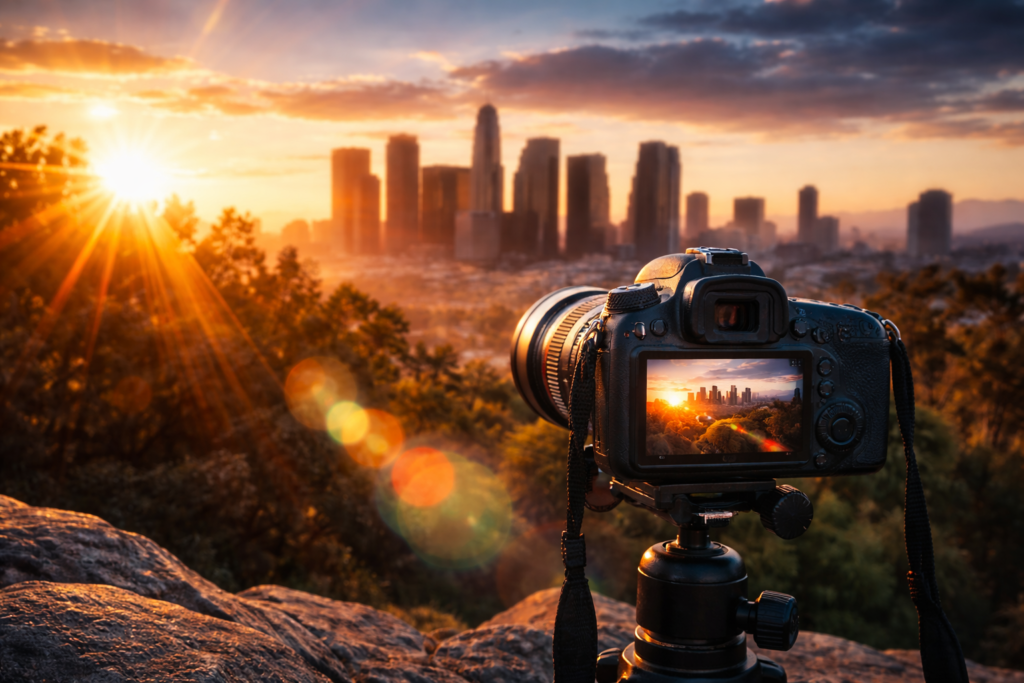
Photeeq Lens Flare is a keyword that keeps showing up in photo editing searches because people love the look of cinematic light. A well-placed flare can instantly make a simple image feel warmer, more dramatic, and more professional. That is why photographers, designers, and content creators often look for lens flare tools that help them add realistic sunlight streaks and glowing highlights in just a few steps.
At the same time, lens flare is not always a “magic upgrade.” When the effect is overused or placed incorrectly, it can make a photo look fake, messy, or low quality. That is why understanding how Photeeq Lens Flare works—and how to apply flares naturally—matters. In this guide, you will learn what this effect means, where it fits in editing, and how to get impressive results without ruining your photo.
What Is Photeeq Lens Flare?
Photeeq Lens Flare is commonly talked about as a lens flare effect used in photo editing. People use the term to describe an editing style that adds bright streaks, soft glow, haze, or sun-like reflections into an image. The goal is to recreate the realistic lighting artifacts that happen when a strong light source hits a camera lens.
In simple words, Photeeq Lens Flare is about making photos feel more alive. It adds mood and atmosphere, especially in outdoor shots, portraits, lifestyle photography, and creative edits. This effect is popular because it can make an image feel like it was captured during golden hour, even if it was taken in flat light.
What Is Lens Flare (Simple Explanation)
Lens flare happens naturally when light enters the camera lens and scatters inside it. This creates extra reflections that show up as circles, streaks, or bright haze. Many photographers try to avoid it in serious commercial work because it can reduce contrast and hide details.
But lens flare can also be beautiful when used intentionally. A soft flare can make an image feel dreamy, warm, and cinematic. That is why lens flare is not always a mistake—it can be a creative choice. The key is control, because the same effect can look either stunning or distracting depending on how it is applied.
Why Photeeq Lens Flare Is Popular in Photo Editing
One reason Photeeq Lens Flare is popular is because modern content demands emotion. Social media visuals are competitive, and a photo needs to stand out instantly. A gentle sun flare can make an image feel premium and eye-catching, helping it perform better on platforms like Instagram, Pinterest, and creative portfolios.
Another reason is simplicity. Many creators are not full-time photographers, but they still want professional-looking results. Lens flare effects offer a quick way to add visual impact without complicated color grading. When used correctly, it feels natural, not forced, which is why people keep searching for it.
Best Uses of Photeeq Lens Flare Effects
Lens flare effects work best when they match the story of the image. For example, a portrait shot outdoors can look more realistic if the flare comes from the direction of the sun. This makes the photo feel like the camera captured a real moment, not an artificial edit.
Lens flare is also great for travel photos, street photography, and lifestyle content. It adds depth and atmosphere, especially when the scene has bright highlights. However, the effect should support the photo—not overpower it. A flare should feel like part of the light, not like a sticker on top of the image.
How to Apply Photeeq Lens Flare Naturally
To apply lens flare naturally, start by thinking about where the light source is coming from. A flare should appear from the same direction as the sun, lamp, or bright object. If the flare is placed randomly, it becomes obvious that it was edited in and the photo loses realism.
Next, keep the intensity under control. A small, soft flare often looks more realistic than a huge bright one. The goal is subtle enhancement. When you place flares carefully and reduce opacity, you keep details visible while still creating a cinematic mood.
Common Mistakes That Ruin Lens Flare Effects
One common mistake is using lens flare too strongly. When the glow is too bright, it can wash out faces, destroy colors, and hide details in the background. This makes the photo look low quality rather than professional.
Another mistake is placing lens flare in the wrong area. If the flare doesn’t match the lighting direction or covers the subject’s eyes, it can feel distracting. Great editing should guide the viewer’s attention, not block it. A lens flare effect should enhance the subject, not compete with it.
Photeeq Lens Flare for Portrait Photography
Portraits are one of the best places to use lens flare because light plays a huge role in emotion. A soft flare can make skin tones feel warmer and give the image a relaxed, natural vibe. This is especially useful for outdoor portraits, couple shoots, and fashion photography.
Still, portrait lens flare must be handled with care. If the flare sits directly on the face, it can ruin sharpness and clarity. The best approach is to keep the subject clean and use the flare around the edges of the frame. That creates a natural cinematic feel without damaging the main focus.
Photeeq Lens Flare for Cinematic and Social Media Content
Cinematic editing is all about mood, and lens flare is a powerful tool for that. It can make videos thumbnails, YouTube cover images, and brand visuals feel dramatic and professional. When people see lens flare, they often associate it with high-end cameras and film-style visuals.
For social media, lens flare works best when combined with good colors and clean composition. A poorly composed photo will not become great just because a flare was added. But when the photo already looks decent, lens flare can elevate it into something scroll-stopping and shareable.
Tips to Make Lens Flare Look Real
The best tip is to use lens flare with a light touch. Subtle edits always look more believable than heavy effects. Instead of adding one big flare, you can use a smaller glow with soft edges to keep the photo balanced.
Another smart trick is blending. Lens flare should merge with the scene’s highlights rather than sitting on top like a flat layer. When the effect blends naturally into the photo, it becomes almost invisible as an edit—and that’s exactly what makes it look professional.
Conclusion
Photeeq Lens Flare is a popular editing keyword because lens flare effects can instantly add drama, warmth, and cinematic energy to a photo. When used correctly, it helps images feel more natural, emotional, and visually appealing. It is especially useful for portraits, travel shots, lifestyle photography, and content creation where mood matters as much as clarity.
However, lens flare is not always a guaranteed improvement. The negative side of the effect is that overuse can ruin detail, reduce sharpness, and make a photo look unrealistic. The smartest approach is simple: use flares intentionally, keep them soft, and place them where real light would naturally appear. That way, your photo looks upgraded, not over-edited.
FAQs
1) What is Photeeq Lens Flare used for?
Photeeq Lens Flare is used to add cinematic lighting effects such as glow, sunlight streaks, and soft flares to photos during editing.
2) Does lens flare make photos look better?
Yes, lens flare can improve a photo when it is used subtly and matches the lighting direction. If it is too strong, it can make the photo look worse.
3) Is lens flare only for outdoor photos?
No, lens flare can be used indoors too, especially when there is a strong light source like bulbs, stage lights, or window lighting.
4) What is the biggest mistake with lens flare effects?
The biggest mistake is making it too bright or placing it in the wrong direction, which makes the edit look fake and distracting.
5) Can lens flare be used in professional work?
Yes, many professionals use lens flare creatively, but they apply it carefully so it supports the subject and keeps the photo clean.